Web management agencies and web developers handle WordPress migration for client sites on a pretty regular basis. It's a simple task, but it still takes time that you'd rather spend on other things.
That's why, here at uPress managed WordPress hosting, we've developed a smooth, user-friendly Auto Migration Tool that automates WordPress migration to make it friction-free.
Here's a quick guide to WordPress migration with uPress.
As you know, the first thing to do before you start any process is to backup the website, even if you're using the uPress WordPress migration tool. You can do this the usual way, either through the cPanel or Direct Admin to download a full backup, which takes 5-60 minutes.

After logging in, go to the uPress Admin Panel to create your new site for WordPress migration.
Go to Homepage >> All Sites >> Create New Domain
After entering the domain in the correct field, click Create Package.
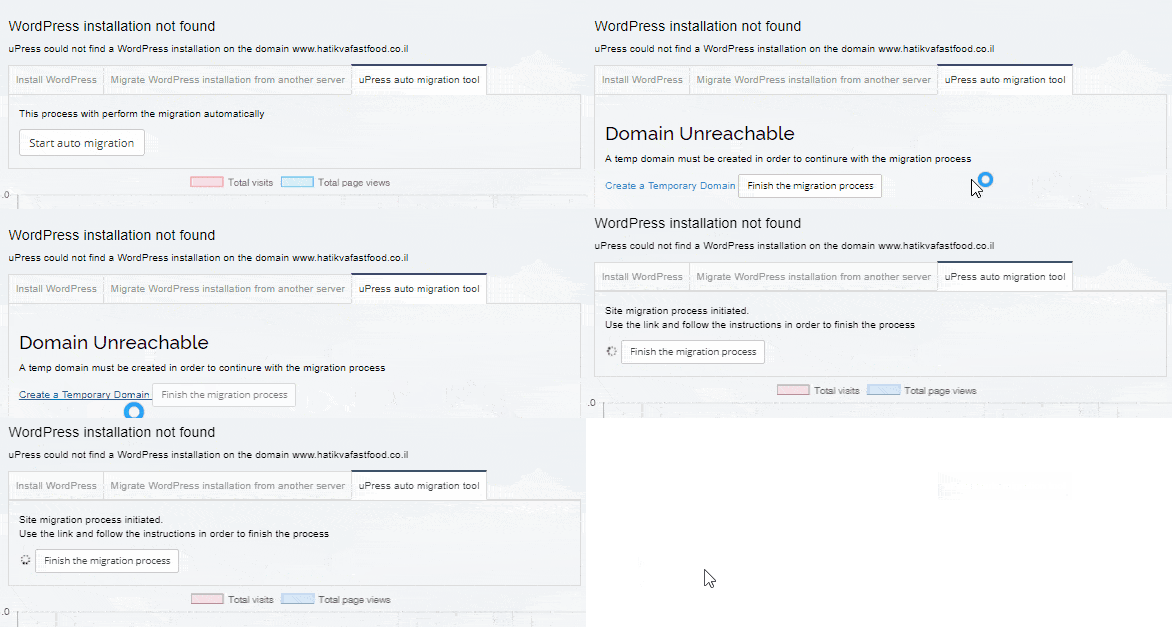
Next, navigate to the Admin Panel of your newly-created WordPress site (mysite.co.il) and open the site migration tool. Click the uPress auto migration tool tab.
Click the Use Site Migration Tool button, and then Start auto migration.

After this, you will immediately be taken to the next screen.
Migrate to uPress within 24 hours

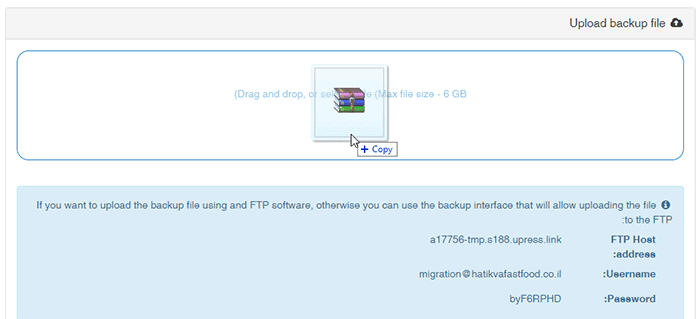
Now you've got the uPress Site Migration tool open and ready to go, it's time to prepare your backup file by:
Once you've uploaded the file, the system automatically identifies it as a full backup and activates the Start Replication button.
When you click Start Replication, the WordPress migration system will run the following tasks:
When Site Replication is complete, you'll see a "success" notification and receive a temporary domain address.
At this point, you can close the WordPress migration tool and continue to the new temporary domain.
That's all it takes to complete WordPress migration for any website, no matter how large or small. At uPress managed WordPress hosting, we strive to make things not only secure, but also intuitive, easy and quick.


