Migrating your website from one managed WordPress hosting service to another can be an exhausting and confusing process for website owners. That's why we developed an easy, intuitive, and fast Free Website Migration System for all our customers as part of our managed WordPress hosting service, to make it effortless.
In this post, we'll explain how to complete a request for your website to move from your previous WordPress cloud hosting server, using the uPress Admin Panel.
Note: You'll need to be a uPress subscriber and have set up your uPress Admin Panel first. When you're ready to sign up for uPress managed WordPress hosting, click one of those green buttons and join us!
The first step is to create a new website on your new host. This website is going to serve as the infrastructure for the website you’re migrating from your previous managed WordPress hosting server.
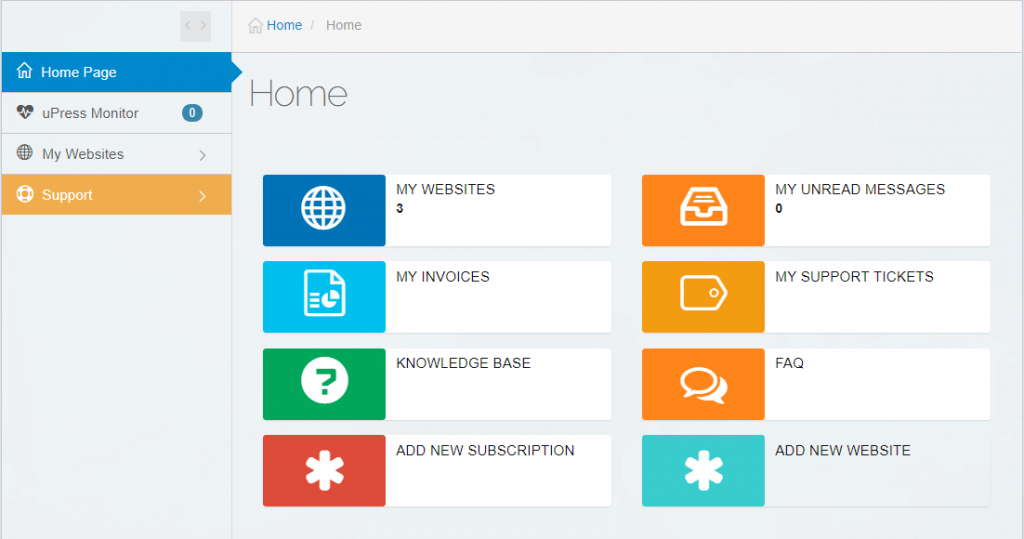
On your uPress Home Page, click "my websites."
Migrate to uPress within 24 hours
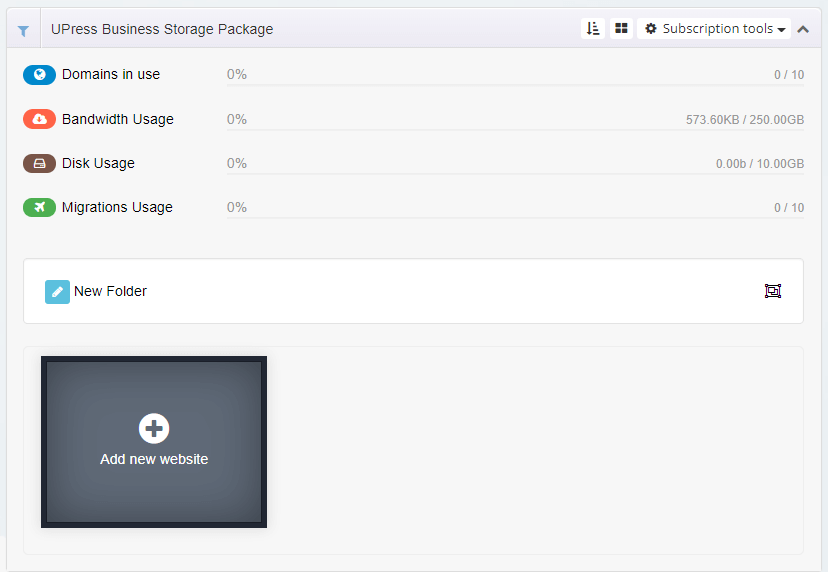
You'll see the uPress Package you selected (Personal / Professional / Business / VPS Server), plus the package data. Package data includes used domains, disk space and monthly traffic. Over time, this will also show how much of your storage package has been used.
To start migration, click "Add new website," as shown in the image below.
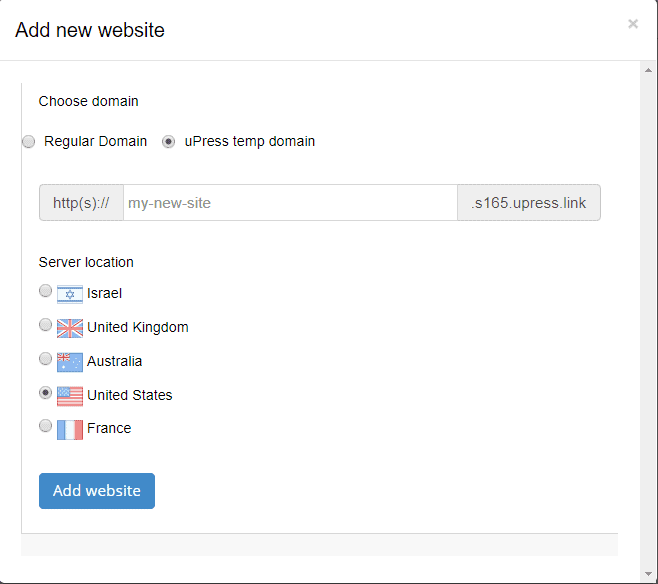
This brings you to a panel where you'll select your URL: If you have a domain, click "Regular Domain" and enter your exact domain address in the field below.
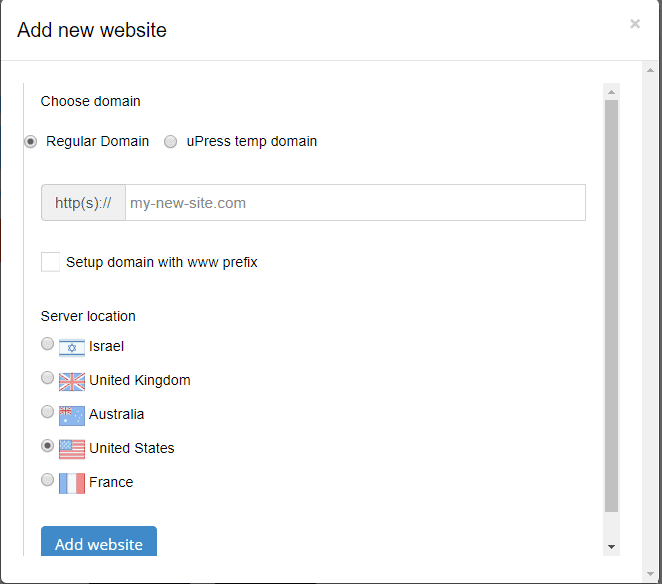
If you don't yet have a domain, don’t worry. Just select "uPress temp domain" and add a website name in this field. You'll see an extension name appear. This will be added to your chosen website name and serve as your temporary domain address.
Choose your new WordPress cloud hosting server location and click "Add Website."
Next, click the blue "Access new-website.com admin dashboard" button.

At the end of the process simply click "Login to Manage Domain".
If you click "Close," the next screen will show a gray square underneath your chosen site address. In the center, you'll see "Management." Click on it to reach the desired screen.
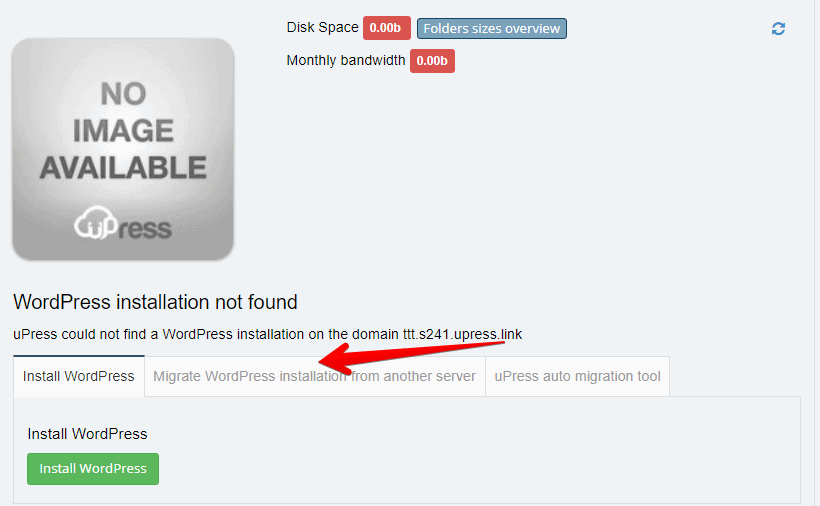
Next, it's time to carry out the actual migration. Select "Migrate WordPress installation from another server" from the tabs on the screen, and complete the fields required.
You'll need to have the following information readily available:
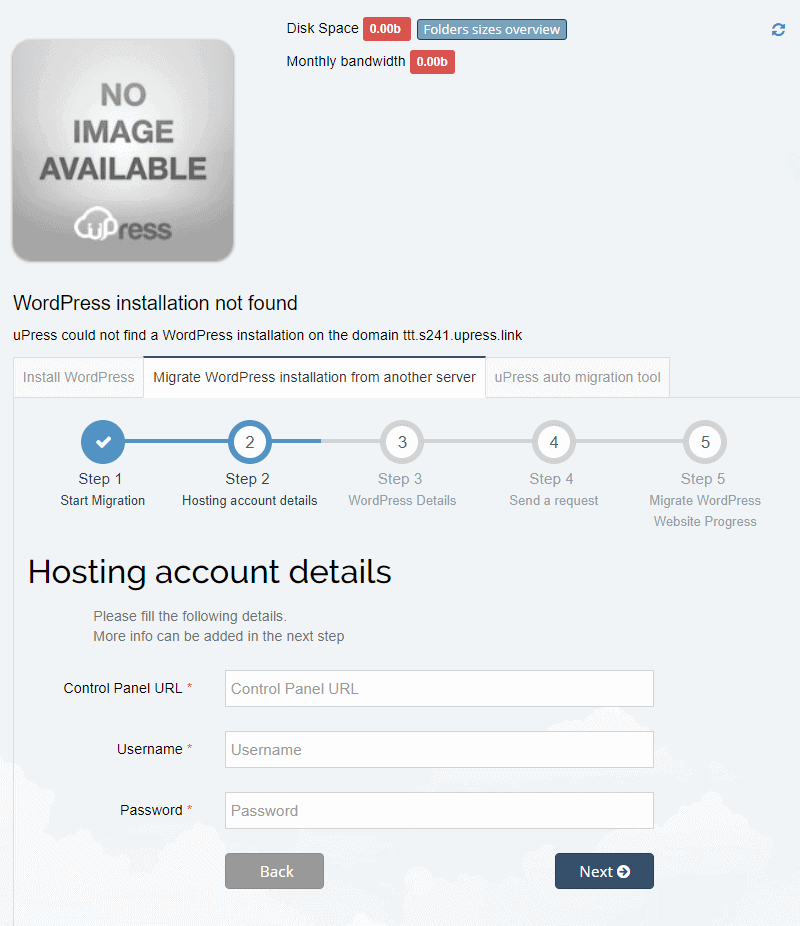
There are 4 steps to this migration request:
If it all goes correctly, you'll see this screen.
You should receive an email confirming that your request was received. We'll send your request to the correct department to be checked, and then complete it within one business day.
Once we have completely and successfully migrated your website from your previous managed WordPress hosting server, we'll send you a confirmation email. FYI – it's very important to check that the website files have been stored in the previous storage
Migrating from your old managed WordPress hosting server should be smooth and fast, so we take these requests seriously. It is important that you check your email throughout the day, in case we need to ask you about any missing details that we need for proper migration.
Once your WordPress migration has been completed and you've checked that all the website files have been transferred correctly, you need to replace your DNS addresses with new uPress WordPress cloud hosting addresses.
You can cancel your previous domain storage approximately 72 hours from when DNS was fully updated, in order to keep your site active for users who are still arriving at the previous WordPress cloud hosting server.
ns1.upress.io
ns2.upress.io
As managed WordPress hosting experts, we speak your language. We can geek out with you about comprehensive WordPress security, but we can also discuss XML-RPC Protocol, Rest API paths, and XSS exploits. You can trust us with the entire gamut of WordPress questions, so stop asking do you need managed WordPress hosting and focus on the only real question left... why aren't we hosting your WordPress site yet? Click below and join us.
