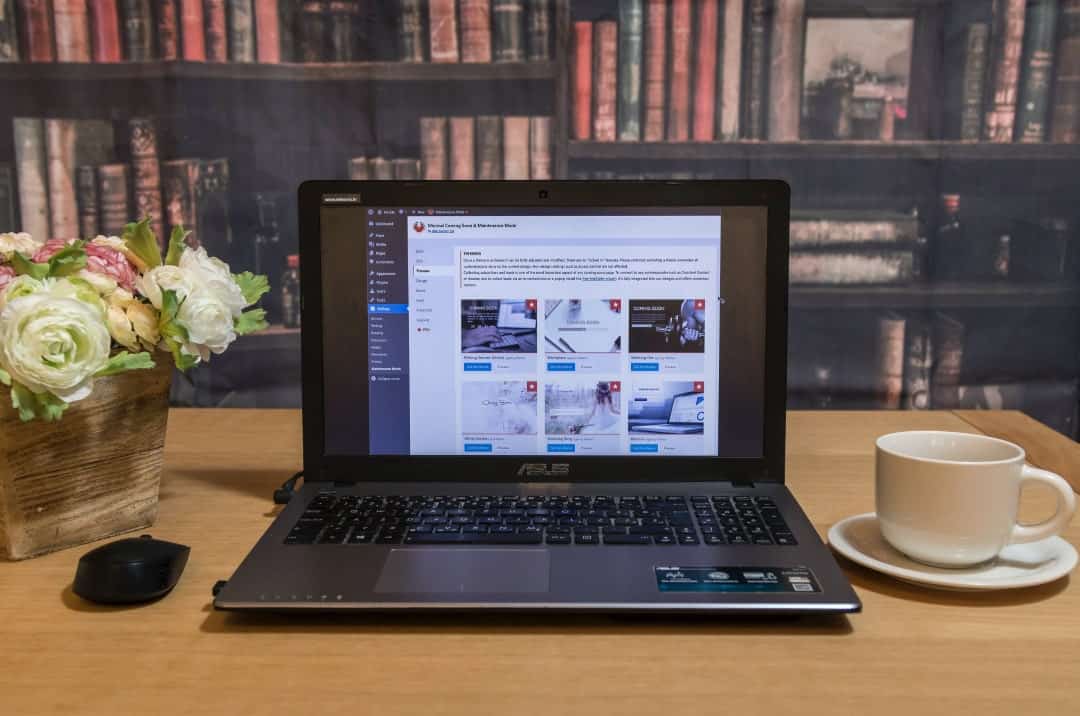
If you're building your own website on the WordPress content management platform, you might be feeling a little nervous about how to get started. Don't worry! We’re here with a friendly and non-scary guide that will take you through each step of building a new WordPress content management site.
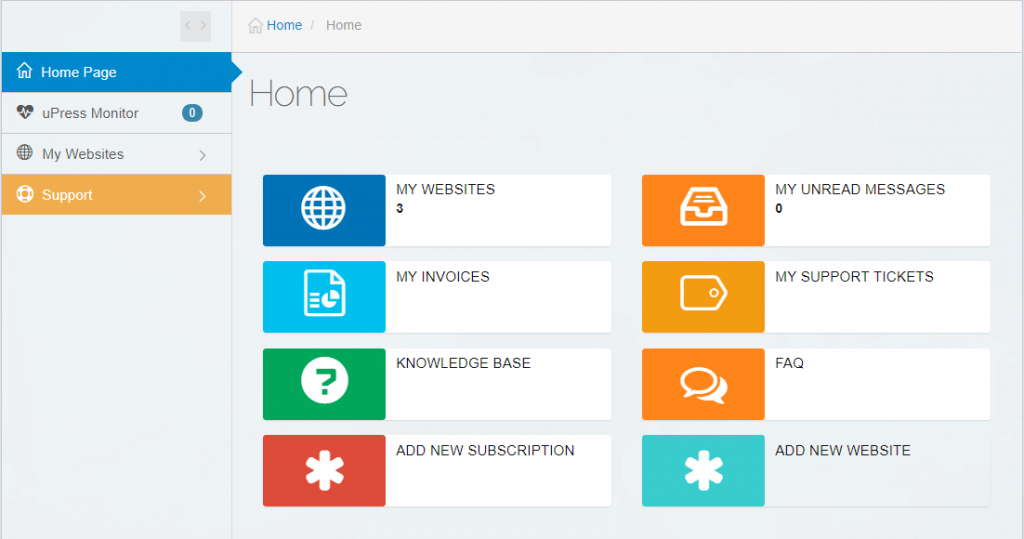
The first step is to create the infrastructure for your WordPress content management site. You'll begin on your uPress home page and click MY WEBSITES.
The first step is to create the infrastructure for your WordPress content management site. You'll begin on your uPress home page and click MY WEBSITES.
Migrate to uPress within 24 hours
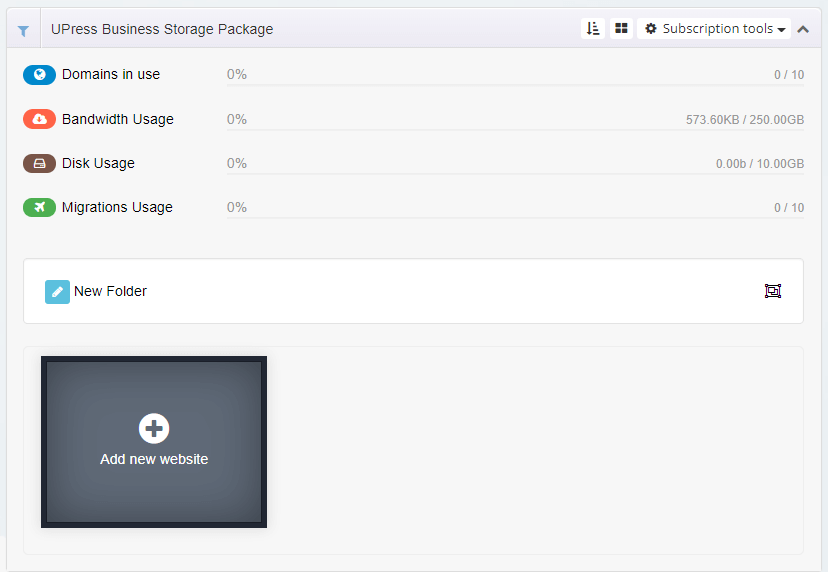
The dashboard will show you which managed WordPress hosting you've bought, either Personal, Professional, Business, or VPS Server.
You'll also be able to see how much package data you've used already, including data used for domains, disk space, and monthly traffic. When you have websites, you'll also see how much of your storage package remains.
Click the button marked Add new website.
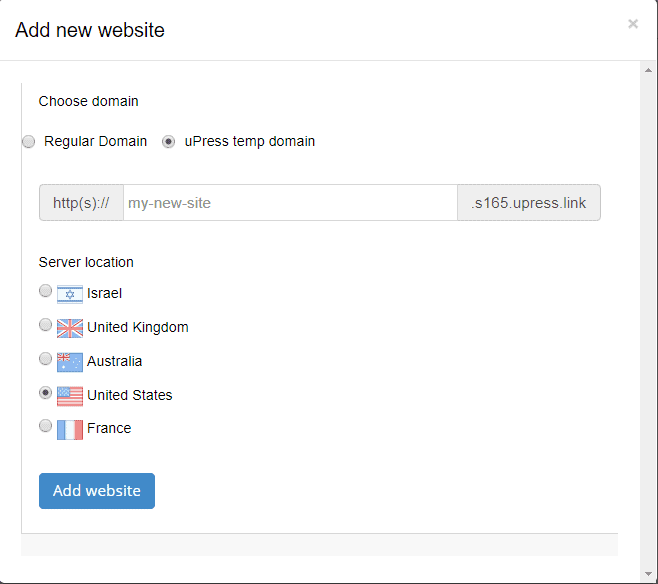
Next, you'll see a window asking for your website URL. If you already have a domain name and you're migrating from another platform, you'll enter it here.
By default, the box for Regular Domain is checked. If you already have a domain you'll leave it checked and enter your exact domain address below.
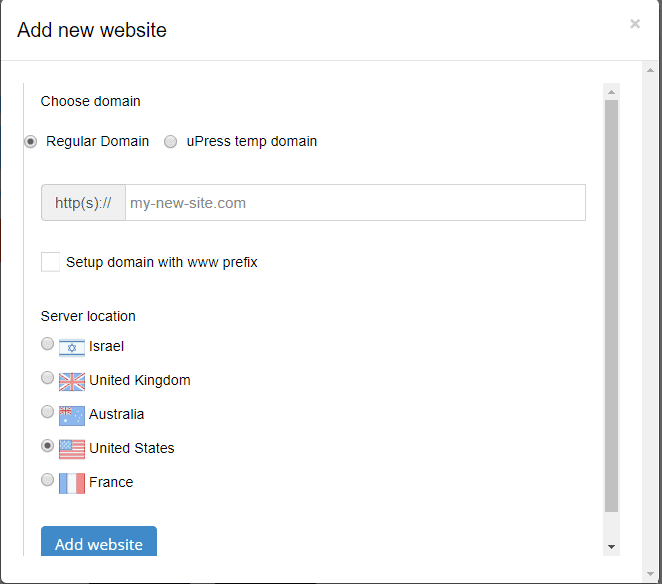
If you don't yet have a domain, you can buy one through uPress managed WordPress hosting. Check the box for uPress temp domain, and write the URL that you'd like to have in the field below. This will become part of your website name in the future, but for now it's just your temporary domain address.
Click the blue button marked Add website, then click Login to Manage Domain.
If you accidentally click Close, a screen will appear with a gray square underneath the address you chose. In the middle of the screen is a button marked Management. Click on it to reach the desired screen.

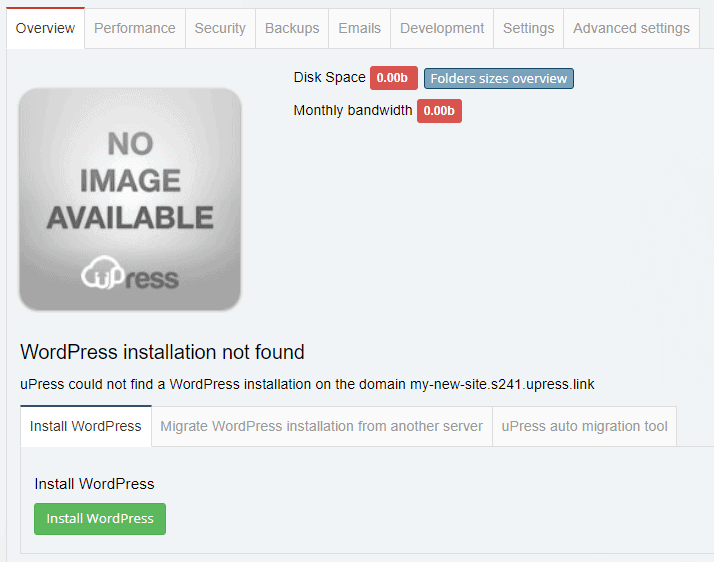
Now you've added a website to your uPress storage package, you can install WordPress content management on the new site.
Click the green Install WordPress button, as shown in the image below.
You'll see a message telling you "WordPress installed." Click on the link below the message, or enter the exact URL into your browser.

You'll see this WordPress content management screen.
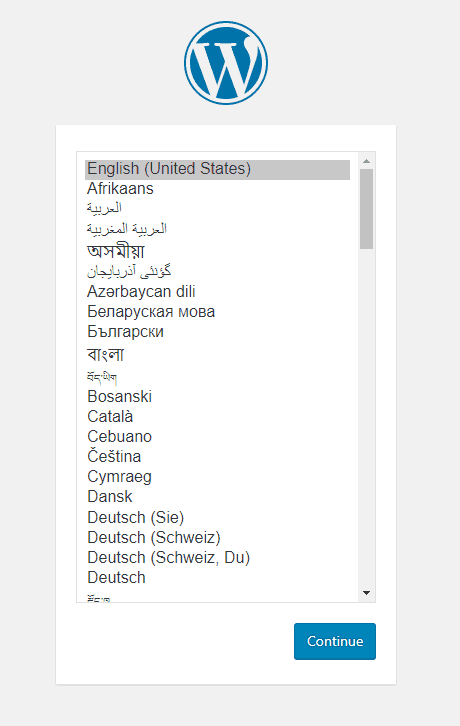
To continue with the installation process, choose the language you want to use to manage your WordPress content management site, then click Continue.
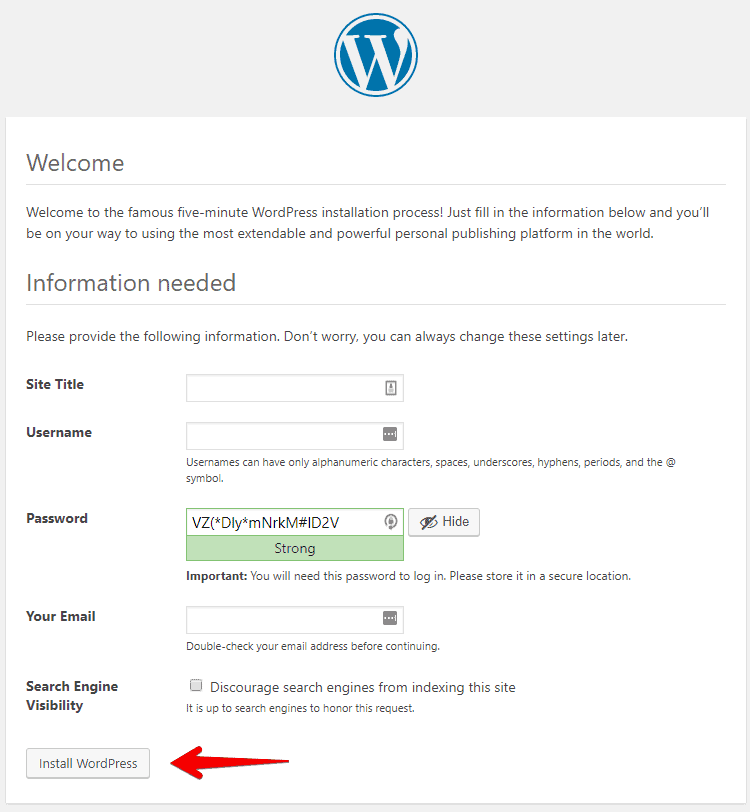
The next window asks for information about the WordPress content management website owner and manager. Complete each of the fields, and then click Install WordPress.
Now you've successfully built a new uPress site and added WordPress content management. You can now choose a theme, add plugins, and customize the appearance of your WordPress content management site. It's time to make your WordPress content management site your own.
While you're tweaking and perfecting your site, it's only visible to you and whomever else you grant access. It’s not yet been published, so the public can't search for it or visit it.
Up till now, your new WordPress content management site has been operating in a temporary domain provided by uPress managed WordPress hosting.
You can work on the website until it is time to publish it by redirecting the site to a Fixed Domain only after you redirect the Domain DNS to uPress. If you have not yet made a DNS redirect, you must access the Temporary Domain provided for this site. Don't forget! When you finish building your website, you need to change the Temporary Domain Name to a Fixed Domain and update the DNS addresses in the Domain Management interface you purchased through the Domain Registrar Company.
uPress Servers DNS addresses: ns1.upress.io \ ns2.upress.io
If you're not sure what to do, you can always open a uPress Support Ticket, and be sure to include the Domain Registrar Access Information and the Domain Address you wish to update.
Once your site is published, you need to double-check your website security. Learn more about how to do that in our SSL Certificate post right here!